Last year, my 1 year old daughter and I tagged along on Daddy's business trip overseas. As you can probably imagine, I was freaking out about being on multiple flights, some really long, with a 1 year old who hadn't flown yet. Anxiety to the max! I combed the internet and Pinterest for ideas on flying, and found so many useful tips that were extremely helpful.
This year, we were blessed to be able to visit family on the opposite side of the continent and yet again, international. Let me tell you, shorter flights are going to be a breeze when we decide to visit family within the country!
Even though my daughter did so well last year, I still had some anxiety about flying with a 2 year old who is definitely more vocal and active than she was when she was 1. Because the tips and tricks from other blogging moms were so helpful last year, I again hit the blogs for ideas to keep her little hands and mind busy. I decided to share the pages I created to provide more ideas and inspiration for those of you planning your own airplane adventures!
Here's a few things you'll want to accumulate, hunt, scrounge, and gather when making your own entertainment pages.
- stickers- as many as possible!
- colorful images- flashcards, pictures/photos, color/paint pages
- textured items- felt, pom poms, large buttons, pipe cleaners,
- fasteners- glue, hot glue gun, Velcro dots or strips, magnets
- flat items of interest- puzzles, notepads, magnets, scrapbook frames/windows
- storage bags or small containers for loose items- pencil cases, butter containers
Visit your favorite craft stores to comb through their dollar bins or hit the good old dollar store for a plethora of items to use on your pages. I also raided my own craft room and my daughter's toy bins. Anything you can recycle or reuse means less money spent! Save that money for the coffee or energy drinks you'll need on this trip! 😊
Basic Assembly Tips:
1) You'll want a nice sturdy page to work with. I had laminated construction pages laying around from previous projects that I re-purposed. They worked fine for my trip, but sturdier card stock or even those thick cardboard boards would be ideal. Consider the size of your pages for your little ones reach and how they will be seated on the plane. The pages I used were a bit long for my daughter's reach from her spot on my lap.
2) Hole punch your pages and arrange in a binder. You can also keep the pages loose leaf and organize a few pages into folders to pull out for different flights.
3) Use a good glue! Hot glue worked well for me, but months now after the trip, my daughter is starting to pull things off the pages.
4) Plan out bulk items on pages. Some of my pages had items that are raised and make the page bulky when turned over or on top of other pages. If using the back side of your pages, use flat items like coloring pages or stickers only so any slope or give will not affect the activity.
***
Note: Many of the small items I used for these activities are for use with adult supervision only! Buttons and beads can be choke hazards or appear like candy! Make sure small items will not fit into the mouth or be sure to be attentive while your little one handles them. My daughter was on my lap for the activities that were messy or had small pieces.***
Now for the pictures! There's a lot. I had more pages too, but you get the idea! Click the images to see in bigger and better detail.
Choose themes that your toddler is interested in. My daughter is all about animals. I was able to pick up flashcards for $1 at Michaels and puzzle pairs at Dollar Tree. Felt pockets stored the pieces and velcro dots were attached to the back of the flashcards for her to attach to the pages.
Of course, things to color are a must! I especially like the color pages with the lovely invisible markers that only work on those particular pages. My daughter loved decorating her princess crowns from the dollar store as well. I also included paint with water color pages for a different change of pace.
I organized my pages by different types of activities. After coloring or playing with stickers, the next page would be hands on to keep interest level high. I had a pencil pouch and plastic baggies to hold the pieces for these color sorts. Buttons, recycled food pouch lids, and pom poms had Velcro dots on the back to attach to the correct color tag.
Note: If using Velcro dots, attach with glue besides the sticker backs or buy a good brand. Mine were from the dollar store and would come off occasionally when my daughter pulled a piece up. I had better luck with Velcro strips that I cut down to size.
The Popsicle stick color sort was an idea I found on this
blog that had other great ideas for busy bags for toddlers.
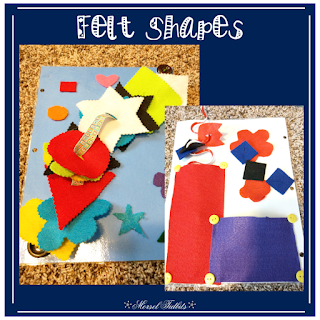
My daughter's aunt had sent her this beautiful felt shape activity made of a ribbon with buttons on the end and felt shapes to fit onto the ribbon. All I did was slap some velcro on the backs of the buttons to attach to the page and viola, super quick activity. I raided anything I could from my crafts closet and her toys to make the activity pages.
The silly straw and felt shape activity came from this
website and was an easy addition to my pages. My daughter was able to put the shapes on but couldn't get them off without getting frustrated. It still entertained her for long enough to be worth it.
Anything that was keeping my precious's little hands busy for this trip was a victory for me! Perhaps her favorite page was the necklace page. In one little bag, I had a few necklaces for her to wear and in the other bag were dollar store wooden beads. Pipe cleaners and a leather string was used for her to add the beads. We probably lost a bead or two under the seats, but that my friends, is why they are from the dollar store! Overall it was very manageable.
I had grabbed a set of dinosaur erasers to be extra pieces to drop into a slot of a small butter container. This type of activity worked last trip and at home, so was included in this trip as well. The dinosaur erasers played double duty for another color sort.
Yes, I am all about the painting with water and magic markers that don't color unless used on the specific page, but I did include a few potential messy pages. Call me crazy, but I was desperate for any and all things that could be entertainment for the toddler and sanity for the rest of the people on the plane! 😉
I glued a thin notebook to the page and attached a cord organizer to hold thin markers. Lots of pages for her to doodle on. This cat themed page also included stickers and cat magnets to stick to a magnetic bookstrip along the top of the page.
Michaels had these cute clear stamp collections for $1. A little hot glue to the back and the back of the stamp holder was secured to the page while still allowing you to peel and select a stamp. I had mini stamp pads and a small stamp block in the pencil holder. A bit messy on the hands, but nothing a wipe didn't fix.
As shown in earlier pages, puzzles and flashcards were a main feature of many of the pages. All pieces fit into plastic or felt pockets attached to the pages when not in use.
My daughter is sticker crazy! As many pages as possible included stickers for her to decorate the pages. The page on the left also had a foldable gift box attached with Velcro for her to sort pom poms, erasers, or other small toys into.
I got the idea to match animal toys to flashcard pictures from this
blog that featured activities for toddlers.
My daughter loved her activity pages and used them frequently on the flights and during the trip. Months later, the activities are still being sought out. Success! Besides activity pages, we used a kids' tablet for apps and movies, other small loved toys, and lots of snacks! Rotating through those items, plus the occasional lucky nap made our trip manageable!
That's all for me, folks! Hopefully you got some ideas to implement for your plane adventures. For more ideas on traveling with your little ones on flights, check out my Pinterest Board
Travel Fun!
Red Airplane Clipart Created By:


