Wednesday, December 13, 2017

Airplanes and 2 year olds!- DIY Toddler Airplane Activity Pages

Last year, my 1 year old daughter and I tagged along on Daddy's business trip overseas. As you can probably imagine, I was freaking out about being on multiple flights, some really long, with a 1 year old who hadn't flown yet. Anxiety to the max! I combed the internet and Pinterest for ideas on flying, and found so many useful tips that were extremely helpful.

This year, we were blessed to be able to visit family on the opposite side of the continent and yet again, international. Let me tell you, shorter flights are going to be a breeze when we decide to visit family within the country!


Even though my daughter did so well last year, I still had some anxiety about flying with a 2 year old who is definitely more vocal and active than she was when she was 1. Because the tips and tricks from other blogging moms were so helpful last year, I again hit the blogs for ideas to keep her little hands and mind busy. I decided to share the pages I created to provide more ideas and inspiration for those of you planning your own airplane adventures!


Here's a few things you'll want to accumulate, hunt, scrounge, and gather when making your own entertainment pages.


  • stickers- as many as possible!
  • colorful images- flashcards, pictures/photos, color/paint pages
  • textured items- felt, pom poms, large buttons, pipe cleaners, 
  • fasteners- glue, hot glue gun, Velcro dots or strips, magnets
  • flat items of interest- puzzles, notepads, magnets, scrapbook frames/windows
  • storage bags or small containers for loose items- pencil cases, butter containers


Visit your favorite craft stores to comb through their dollar bins or hit the good old dollar store for a plethora of items to use on your pages. I also raided my own craft room and my daughter's toy bins. Anything you can recycle or reuse means less money spent! Save that money for the coffee or energy drinks you'll need on this trip! 😊


Basic Assembly Tips:

1) You'll want a nice sturdy page to work with. I had laminated construction pages laying around from previous projects that I re-purposed. They worked fine for my trip, but sturdier card stock or even those thick cardboard boards would be ideal. Consider the size of your pages for your little ones reach and how they will be seated on the plane. The pages I used were a bit long for my daughter's reach from her spot on my lap.

2) Hole punch your pages and arrange in a binder. You can also keep the pages loose leaf and organize a few pages into folders to pull out for different flights.

3) Use a good glue! Hot glue worked well for me, but months now after the trip, my daughter is starting to pull things off the pages.

4) Plan out bulk items on pages. Some of my pages had items that are raised and make the page bulky when turned over or on top of other pages. If using the back side of your pages, use flat items like coloring pages or stickers only so any slope or give will not affect the activity.


***Note: Many of the small items I used for these activities are for use with adult supervision only! Buttons and beads can be choke hazards or appear like candy! Make sure small items will not fit into the mouth or be sure to be attentive while your little one handles them. My daughter was on my lap for the activities that were messy or had small pieces.***


Now for the pictures! There's a lot. I had more pages too, but you get the idea! Click the images to see in bigger and better detail.


Choose themes that your toddler is interested in. My daughter is all about animals. I was able to pick up flashcards for $1 at Michaels and puzzle pairs at Dollar Tree. Felt pockets stored the pieces and velcro dots were attached to the back of the flashcards for her to attach to the pages. 


Of course, things to color are a must! I especially like the color pages with the lovely invisible markers that only work on those particular pages. My daughter loved decorating her princess crowns from the dollar store as well. I also included paint with water color pages for a different change of pace.


I organized my pages by different types of activities. After coloring or playing with stickers, the next page would be hands on to keep interest level high. I had a pencil pouch and plastic baggies to hold the pieces for these color sorts. Buttons, recycled food pouch lids, and pom poms had Velcro dots on the back to attach to the correct color tag.

Note: If using Velcro dots, attach with glue besides the sticker backs or buy a good brand. Mine were from the dollar store and would come off occasionally when my daughter pulled a piece up. I had better luck with Velcro strips that I cut down to size.

The Popsicle stick color sort was an idea I found on this blog that had other great ideas for busy bags for toddlers.


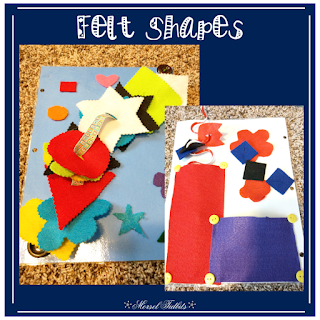
My daughter's aunt had sent her this beautiful felt shape activity made of a ribbon with buttons on the end and felt shapes to fit onto the ribbon. All I did was slap some velcro on the backs of the buttons to attach to the page and viola, super quick activity. I raided anything I could from my crafts closet and her toys to make the activity pages.

The silly straw and felt shape activity came from this website  and was an easy addition to my pages. My daughter was able to put the shapes on but couldn't get them off without getting frustrated. It still entertained her for long enough to be worth it.


 Anything that was keeping my precious's little hands busy for this trip was a victory for me! Perhaps her favorite page was the necklace page. In one little bag, I had a few necklaces for her to wear and in the other bag were dollar store wooden beads. Pipe cleaners and a leather string was used for her to add the beads. We probably lost a bead or two under the seats, but that my friends, is why they are from the dollar store! Overall it was very manageable.

I had grabbed a set of dinosaur erasers to be extra pieces to drop into a slot of a small butter container. This type of activity worked last trip and at home, so was included in this trip as well. The dinosaur erasers played double duty for another color sort.


Yes, I am all about the painting with water and magic markers that don't color unless used on the specific page, but I did include a few potential messy pages. Call me crazy, but I was desperate for any and all things that could be entertainment for the toddler and sanity for the rest of the people on the plane! 😉

I glued a thin notebook to the page and attached a cord organizer to hold thin markers. Lots of pages for her to doodle on. This cat themed page also included stickers and cat magnets to stick to a magnetic bookstrip along the top of the page.

Michaels had these cute clear stamp collections for $1. A little hot glue to the back and the back of the stamp holder was secured to the page while still allowing you to peel and select a stamp. I had mini stamp pads and a small stamp block in the pencil holder. A bit messy on the hands, but nothing a wipe didn't fix.


As shown in earlier pages, puzzles and flashcards were a main feature of many of the pages. All pieces fit into plastic or felt pockets attached to the pages when not in use.


My daughter is sticker crazy! As many pages as possible included stickers for her to decorate the pages. The page on the left also had a foldable gift box attached with Velcro for her to sort pom poms, erasers, or other small toys into.


 I got the idea to match animal toys to flashcard pictures from this blog that featured activities for toddlers.


My daughter loved her activity pages and used them frequently on the flights and during the trip.  Months later, the activities are still being sought out. Success! Besides activity pages, we used a kids' tablet for apps and movies, other small loved toys, and lots of snacks! Rotating through those items, plus the occasional lucky nap made our trip manageable!

That's all for me, folks! Hopefully you got some ideas to implement for your plane adventures. For more ideas on traveling with your little ones on flights, check out my Pinterest Board Travel Fun!

Red Airplane Clipart Created By:


Tuesday, September 26, 2017

Parent Teacher Conference Forms

It's getting close to that time of year again! Parent Teacher Conferences require that a lot of information be presented in a short amount of time. Having a form to condense all that information into a format that is easy to follow and allows you to cover all the information you need in one meeting is essential!


I tried many formats for PT Conferences over the years and gradually figured out what works best for me and the flow of the time we were given per student. Don't worry! You will find your rhythm too. If you are looking for some forms to organize your time, keep reading!


I start my conferences with a Student Reflection. Personally, I like having my students attend the conferences and talk through this first form together. It helps set the tone of the meeting, and allows everyone to settle down nerves about possible issues! Students talk about what subjects they feel they are excelling in and which ones they do not feel as confident in.


I find it interesting to then compare that form with my assessment of how the student is doing in class. First up, I cover classroom skills. Here I focus on group work, independent work, homework, and behavior skills.

There are two options for the classroom skills page. One has the checklist of skills and the categories of Excellent, Satisfactory, and Struggling with a Notes section at the bottom. The other has the same checklist but with a notes line per skill. I personally use the first one.


The next page option focuses on areas that help is needed in. Here is where you can jot down what subjects need more support in and reasons why.


I end with the grades page and compare the grades to the student reflection. Sometimes the student's feelings match their grades, other times the student is pleasantly surprised that a subject that is challenging does not necessarily mean a low grade. Other times, students feel confident in everything and need a gentle reminder of areas they are struggling in.

If you use a digital gradebook, you can print and attach the grades over the grade section and use the note section to attach information on standardized testing.


That's all for this set. This format has worked well for me to cover what needs to be said in the short 20 minutes that I have. If you are interested, head on over to my store to check this resource out. Best of luck in conference season! Don't forget to pamper yourself a little too. You deserve it!


Thursday, September 21, 2017

Pirate Compass Clue Activity

Geography is the original subject that makes pirate theming easy. Why not learn about maps, geography terms, and compass skills in a pirate setting? It sure captured my student's interest right off the bat! I already worked on map skills with my Pirate Geography Worksheet set, but I wanted to look closer at compasses and intermediate directions.


Pirate Compass Clue Activity has a treasure map of the open sea with islands that a ship needs to navigate through to get to the final island with the treasure chest. Each island has a different pirate item that is used to help create the direction clues using intermediate directions that will navigate the pirate ship on the correct path to the treasure.


The activity starts with identifying and practicing intermediate directions on a compass.


A teacher example with a path already created and direction clues is then used to model how to complete the activity. Useful, right? I started to hate using the first few problems of assignments to model how to complete activities, so I'm in love with the idea of having a separate teacher example!


For a bit of differentiation, there is a blank map for students to create their own path and direction clues or if that is too open ended for some of your struggling students, there is a map with a created path that is different from the teacher's example so they can focus in on writing the direction clues.

Or you can use the student path map for independent practice and use the blank map for an assessment grade or vice versa!


Interested? Head on over to my store, Morsel Tidbits, to learn more or to find more pirate themed goodies!


Monday, September 18, 2017

Pumpkin Patch Match: Multiplication with Arrays Center Game

It's pumpkin season! While I'm not all things pumpkin spice, I certainly have a few baked favorites! I also love going to pumpkin patches and corn mazes, especially now that I have a daughter who loves to be outside. Oh, did I mention food?! Fall is seriously a delicious season for food items. I'm getting hungry just thinking about pumpkin muffins , pumpkin loafs, and all drinks that are cinnamon forward! Anyways, this post is not about food or corn mazes. It is about my new fall-themed resource, Pumpkin Patch Match!


I fell in love with a Halloween set of pumpkin clipart. I used some of the pumpkins in October's Student Monthly Planner, but I wanted to use them again for an activity. I feel like I always need more resources to continue the essential practice of multiplication facts. So, a center game featuring the adorable pumpkin clipart made it's debut.

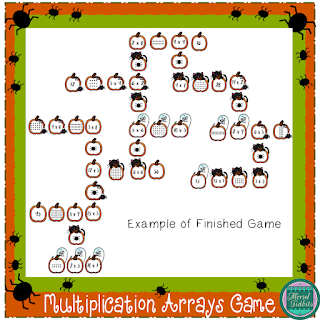
Pumpkin Patch Match is similar in feel to dominoes. You match up equations with arrays, answers, or even other equations with the same total amount in horizontal lines. To move the patch up vertically, a match in equations sharing a same factor is connected using a bug game piece.


The end game board will have pumpkin pieces stretching in neat rows and columns to create a whole patch. The game will need space to grow, so the floor is the best place to play the game. You can use the game pieces multiple ways. Go ahead and use the set as matching practice independently for a student who needs a bit more practice, or play Nertz with a partner and stack the game cards in piles of matching pieces.


Want to use the game during your lesson on multiplication with arrays? Use the larger teacher board pieces to model on the whiteboard how to play the game. 


The game is available in color or blackline. I recommend laminating for longevity if using as a center.


Do you ever find center activities that you love and then wonder if it was helpful or not? I usually lead small groups myself when it is center time. While I do the teacher room sweep occasionally, I'd rather have a bit more information on how a game center is going. To this end, Pumpkin Patch Match includes a quick check for understanding for students to complete after playing the game. Whether completing right after the game independently or waiting until the whole class has cycled through the game, the Game Board Practice sheet can provide you with a grade or just a quick check to make sure learning is occurring.


Like what you see? Head on over to Morsel Tidbits on TeachersPayTeachers to check it out! 

So grab yourself a pumpkin spice latte, or a pumpkin nut cookie (my favorite), and enjoy the fall season! I'll just sign off with my favorite pumpkin spice meme so far, courtesy of (reposted is more likely) by Body Conscious.


Thursday, September 14, 2017

International Talk Like a Pirate Day Freebie

Imagine my disappointment this year when I found out Krispy Kreme was not planning to have their doughnut give away for pirate-dressed enthusiasts! Yep, one of those enthusiasts is me. I was planning all sorts of costume fun that day. No worries! I still got to have fun in my costume for filming in character for my new freebie in honor of International Talk Like a Pirate Day. Watch the video to learn more! Sorry for the narrow view. I filmed for the first time on my phone. Live and learn!


To download the freebie, head on over to my store. If anyone dresses up for International Talk Like a Pirate Day, I'd love to see your outfits! I have other plans simmering for costume fun that day. (I honestly enjoy this day way more than Halloween, but then any dress up day is a favorite day!)

Thursday, September 7, 2017

Student Monthly Planners

It's a little later in the season to be posting my Student Monthly Planners since school has already started for so many, but I can't help it when I get the desire to create a new resource. I've learned to just go with it when an idea has me in its clutches; same thing for housework, or cleaning my classroom. It's too bad that particular desire doesn't hit as often as it should. 😅


When I taught 5th grade, agendas were already in use. I got hooked on the usefulness of agendas. When I moved to 3rd grade though, planners were not provided! We did eventually get some, but even then students lose them or lose interest in the same old, same old. What I used my agendas for were mainly assignment due dates, spelling lists, and useful storage space for log ins and passwords for the many different websites that we use regularly.


Why create my own planners then? Pretty much the same reason you might have for creating anything of your own: preference, class needs, and fun clipart!


Before jumping into the breakdown of the planners, if you want a quick overview of the planner, check out the preview video right now. It's also embedded below at the end of the post if you'd like to read first. Choices! Choices!

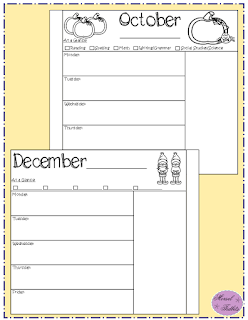
So, what is in the planners? The inside of the cover features a class and school news section. Great for written reminders for class parties, lunch fund reminders, PTA events, etc. Options are labeled for useful section like websites, Events, Requests, and News or a blank option is available as well.


The inside pages are dedicated to each week with the standard space to write assignment due dates. Along the top is an At a Glance section for a quick check of what the homework is for that week before looking below for details. Planners have prelabeled sections or blank ones to be filled out as the week dictates.


One feature I'm loving is the Add On Booklet section. Yes, there's space for your standard spelling list, either lined or blank, but now that space can hold a lot more information without cluttering up the rest of the page. Stack as many add on pages as needed to create a booklet. Options for the booklet are the aforementioned spelling lists, two options for reading logs, blank math facts page, multiplication fact pages for facts 1-12, teacher notes, and regular notes. If you print your spelling lists like I do; you can cut and glue directly to the blank spelling list page or on the Add On Booklet Space.

I'm open to ideas for more note pages. If there is a specific label or page that you are dying to have, I might just be able to help you out!


The last page differs depending on if the month has 4 or 5 weeks. For the 4 week months, the last page consists of a teacher/parent communication page on the inside and on the outside, a doodle space. Attach notes that need signatures and check for quick parent messages there. Don't forget to date each response in case the planner does not make it to parent eyes as quickly as expected from all adults included. (Also, no need to worry about Kayla's feelings about her info being shared. She's not real! 😉)


The months that have 5 weeks end with the parent and teacher page. You are certainly welcome to switch that up to whatever you need though.


Each week and month features different clipart relating to the month, so seasons and holidays feature frequently. The clipart is easy to color for students to make the planners their own or not if coloring is not their thing. You could have planner coloring contests to encourage neat presentation style and award special deluxe planner stickers as rewards.


Oh yes, stickers! I know stickers can be overused, but make certain ones special and they become badges of honor. Also, using certain stickers to emphasize due dates or stepping stones of projects can help the project stand out on the page and give a sense of working towards a goal. Sticker charts in planner form. You know how fun adult planners can be with all the gel pens, stickers, and colors right? Those can all be great incentives to using a planner efficiently or rewards for positive behavior. In a similar way, play with color coding certain homework types or projects. Again, with the idea of keeping the important things easy to spot on a page of text.

Need a closer look at the planners? I have two great ways to do that. First, watch the video preview below. Just remember more add ons have been added for planner efficiently and possibly more in the future. If you do buy, don't forget to check back before the beginning of the school year to download the new current calendar set.


Second, the month of September is a freebie! Download it and try it out! If September has passed, you can still get an idea of how the planner is set up.

Download it!

Here's to student planner success! Best of luck with the new school year!


Tuesday, August 1, 2017

U.S Capitol Paper Model

After many hours of hair pulling and exasperation, I ruefully reflected on the reason of why I was in my current predicament. Oh yes, I had wanted a challenge. 😊😅 I had started percolating ideas for my next resource and while I had a whole list of ideas, I kept thinking back to my Castle Model. Models are just plain fun and a great way to enhance a lesson or a report.

So, a model then. What would I love to have a model for? A model for my government unit, specifically the branches of government, sounded like just the resource I wanted to beef up interest in a somewhat confusing concept for kids.


Each project I work on, I learn more about the software I use to create resources. I was ready for a bit of a challenge. I chose the U.S. Capitol building for my model and jumped in working on the East Side. What a beautiful building! I figured I could reuse many of the same design features for the rest of the building. Ha ha! Jokes on me! Who knew how many different kinds of windows and lamp posts there were, not to mention the incredible detail work so high up on the dome, who would ever know it's there? Well, I did my best to include as much detail as I could. Some of the ornate carvings have been simplified, and some are best seen in real life with the aid of a very good camera lens since, alas, I am not a Grecian artist. I have not had the fortune of visiting our capitol, so this model is designed from my pouring over as many photos from as many angles as possible. As such, (disclaimer), while attentive to detail, the model is not a replica. 5 months later, here we have it! I almost bit off more than I could chew, hence the hair pulling, but wow, I kind of love all the detail in the finished product!


Enough about the process; on to the specs of the model. Featuring a ground level floor for the main building, the dome level, and the optional add on lower level for the West Side, the U.S. Capitol Building showcases the general design of the building including the Senate and House of Representatives wing. Next to the dome are the smaller domes of the House and Senate. Finish it off with the lower level and your U.S. Capitol is complete. Sitting at just under the length of a poster board, this model is definitely project level! For just the building alone, the model comes in at 25 inches long, 6 inches wide, and 17.5 inches high. This doesn't include the poster platform or the lower level.


The lower level is a nice addition, but to use it you need to have a poster board to create a platform in order to insert the lower level. This adds time and more materials to the project, so I'd call this optional or as classroom needs necessitate. 


The East Side's design is different than the West Side's. The roof line is different and the staircases and small patios with lamp posts and wrought iron fencing are more charming to me than the West Side.


Cardstock is the best material for supporting the model, but who really can copy 23 pages per student in cardstock? Perhaps if the model is being completed as a group I might. Copy paper it is. The model will work with copy paper, but you will need some more support so that the model doesn't flop too much. Tape a few bendy straws together and then bend out the top of the straws to create a nice support for the roof. Tape under the dome and anywhere else you feel needs more support and viola!


Thinking it might be complicated? No worries! I've got you covered with assembly guides for each section of the building and of course teacher notes to make the process streamlined. The main building comes together quite quickly. The roof and the main dome will require a bit more finesse in gluing and assembling.


Check out the video below to see how to assemble the model. Written directions are fine, but why not just watch the video? 😉


Now, what do you think? Give models a rest or try out the Idaho State Capitol Building? We'll see if the model bug hits me again, but I think my pirate and medieval themes are feeling lonely after this long journey. Until then, happy modeling!